Hosting Blazor Boilerplate 2.0.0 on Azure
(Note: This document builds upon, and credits, an earlier pdf guide produced by @soomon).
This guide produces a working demonstration installation of Blazor Boilerplate on Azure App Services. Various configuration settings, security and design considerations must be evaluated before moving into production.
This guide is tested/working as at June 2021.
Preamble
Please be aware that hosting on Microsoft Azure will cost money. This tutorial assumes that you already have a working Azure subscription.
In this example, Blazor Boilerplate is being hosted using App Services and a managed SQL database.
The certificate for Identity Server has been stored in Azure Key Vault.
Visual Studio is being used to deploy the app to Azure. Version 16.10.0 was used in this example.
Ensure that you choose the same subscription, region and resource group for all resources created in this tutorial. Some Azure resources cannot see each other across regions.
All URIs, resources, usernames and passwords shown have been deleted prior to publishing.
Configure Azure Environment
Create the Azure Web App
Using either the Azure Portal App (https://portal.azure.com/App/Download?acceptLicense=true) or the portal web interface, create a new Web App and configure it as follows:
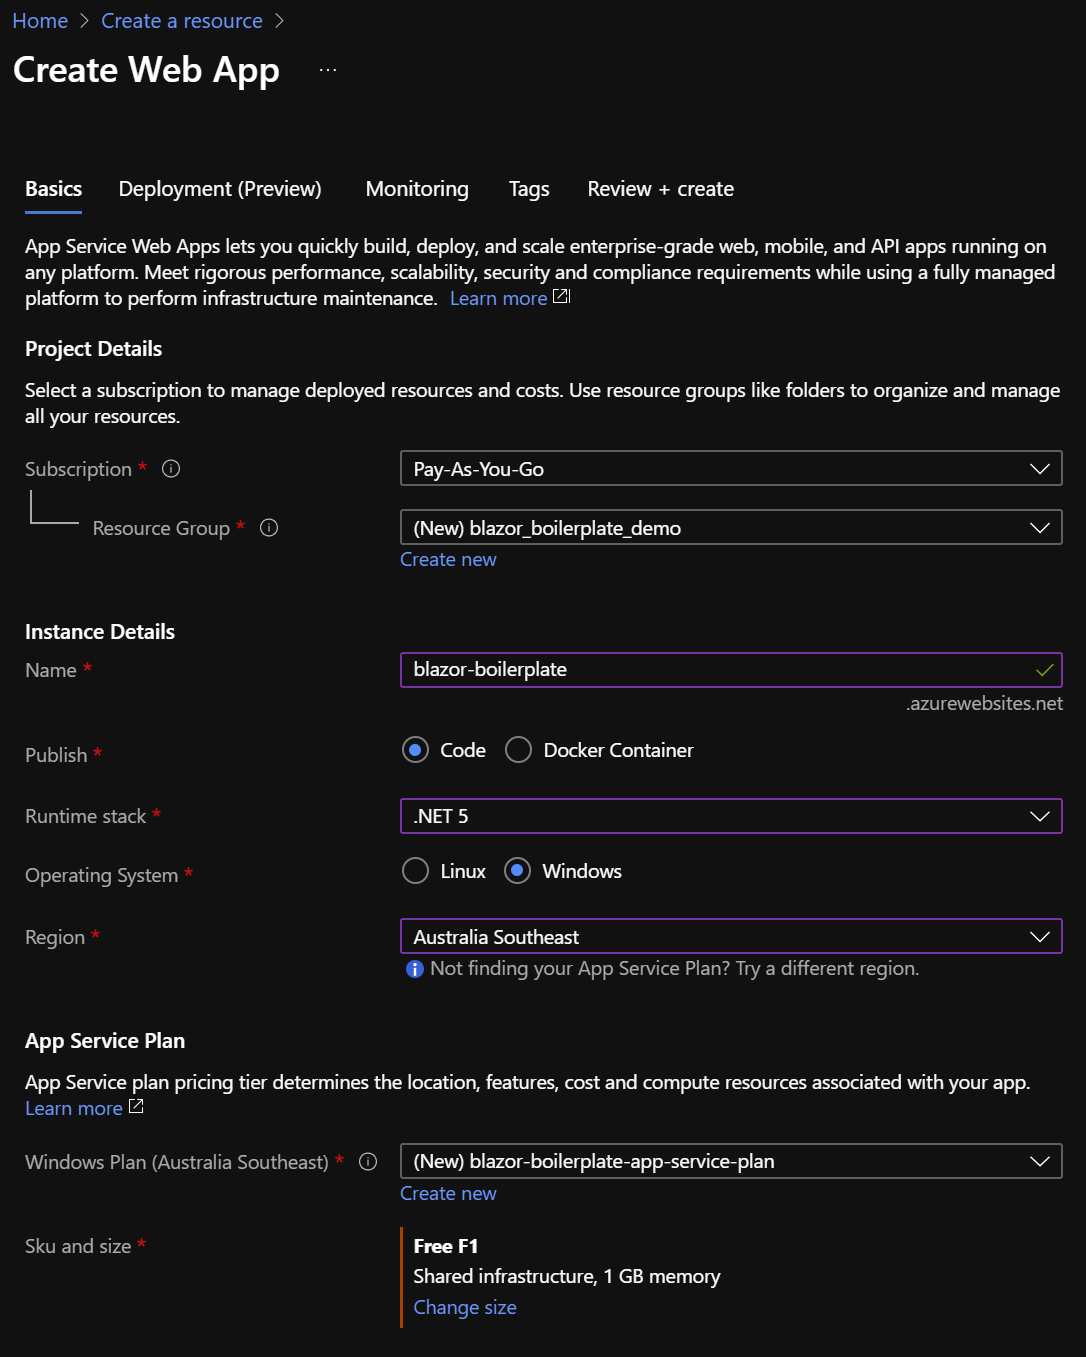
Resource Group: (create new) blazor_boilerplate_demo_rg
Instance Name: blazor-boilerplate **(.azurewebsites.net)
Publish: Code
Stack: .NET 5
OS: Windows
Region: (whatever works for you)
App Service Plan: (create new) blazor-boilerplate-app-service-plan. Select the Dev/Free F1 tier for demo purposes.
** The instance name must be globally unique. It is created in the azurewebsites.net domain.
Review + Create the new web app, then open the resource to continue with configuration.
Configure the Azure Web App
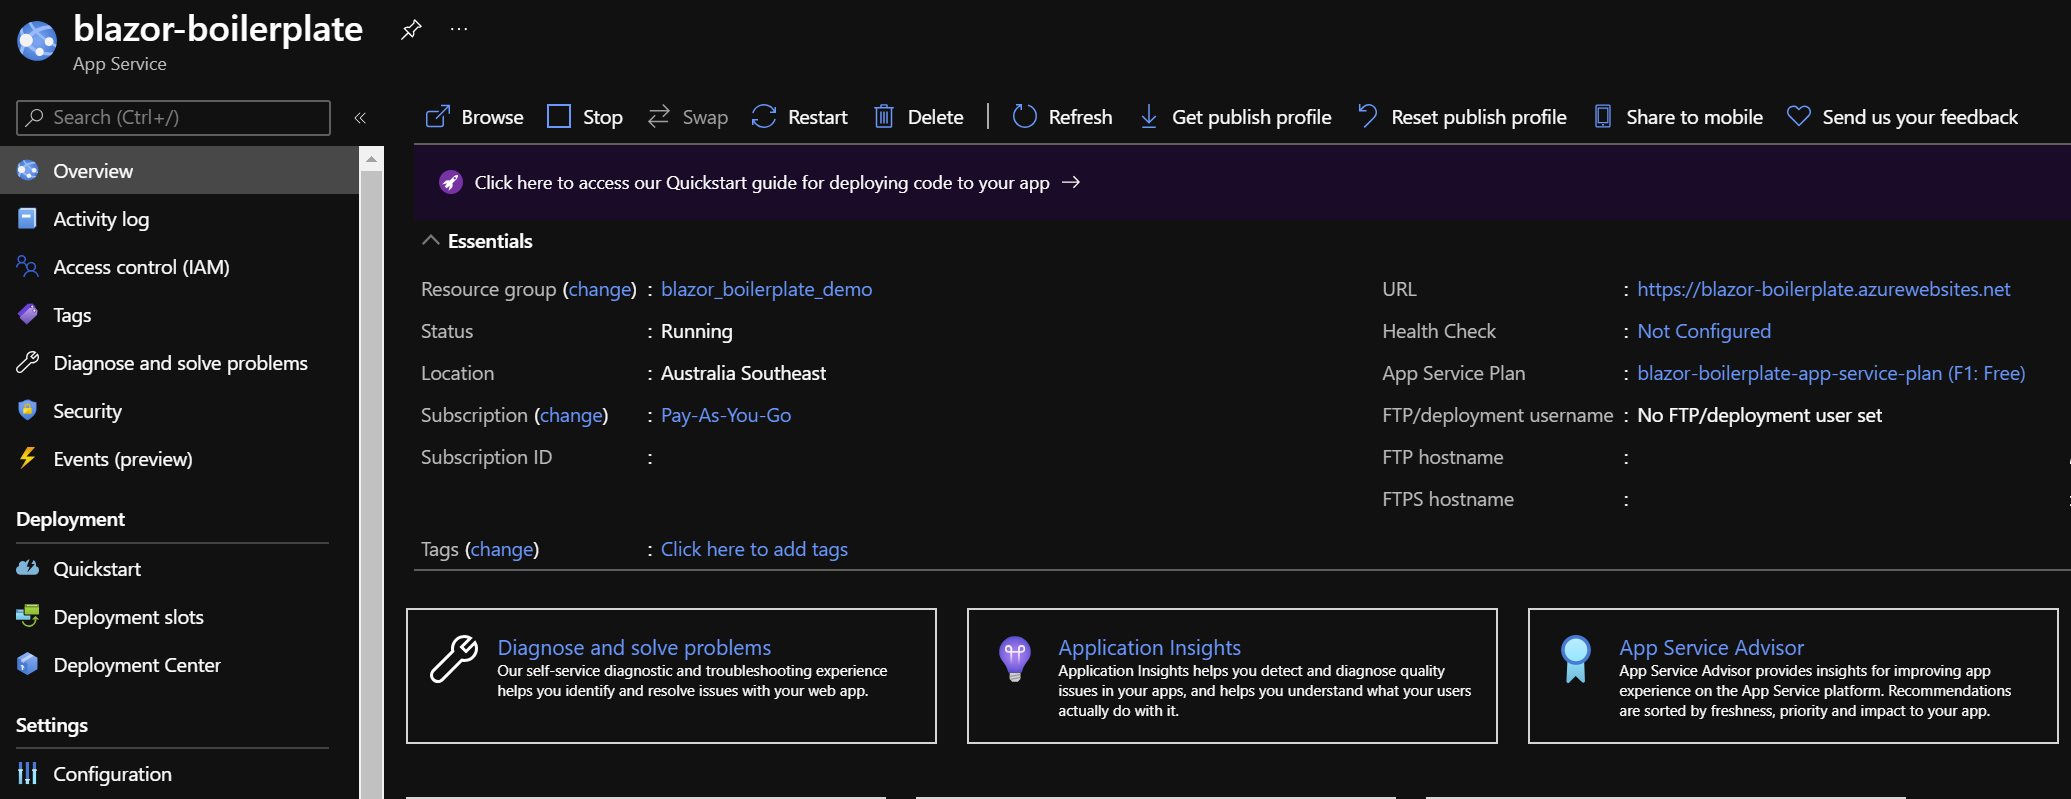
- Select Configuration and General Settings and configure as follows:
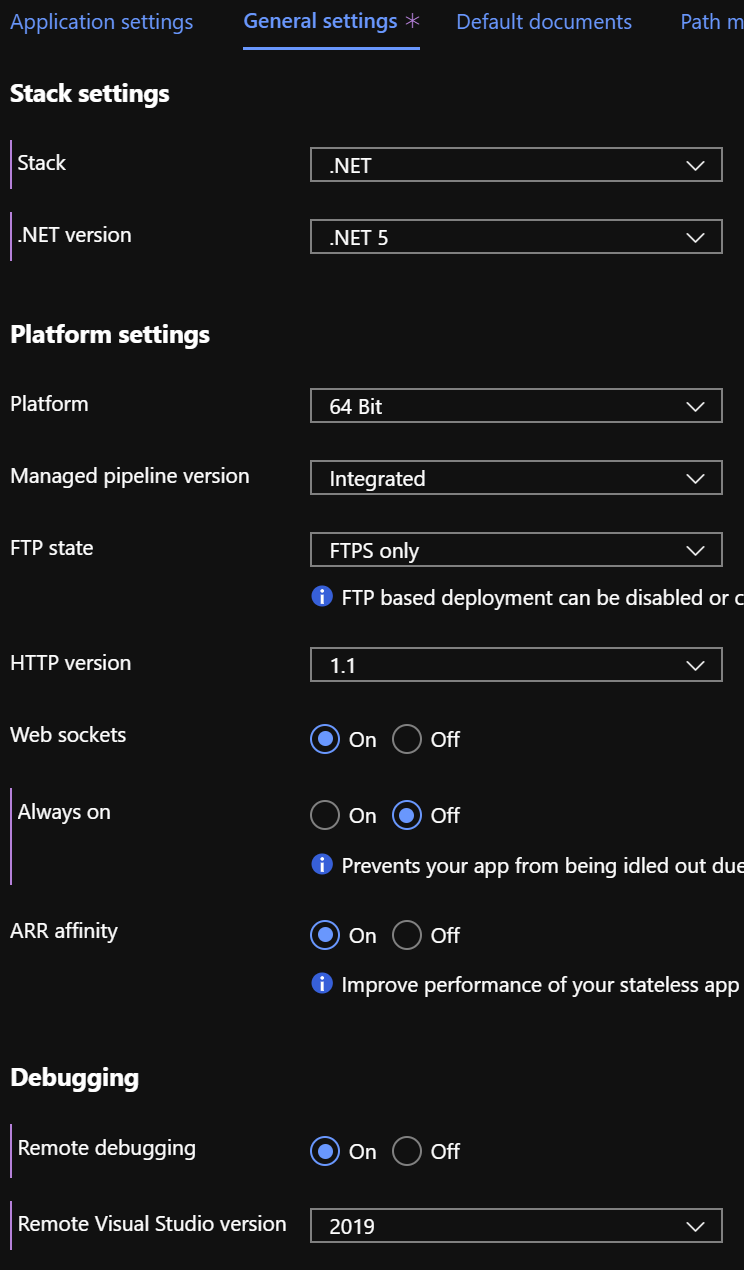
Stack: .NET
.NET Version: .NET 5**
Platform: 64 Bit
Pipeline: Integrated
Web Sockets: On - * Important
** Currently there is a bug in the portal that causes .NET version to display .NET Core (3.1/2.1) whenever you return to the general settings page. This is OK, it doesn’t affect our demo.
Save these general settings and exit configuration.
- Select Identity and confirm that that System Assigned identity is turned on.

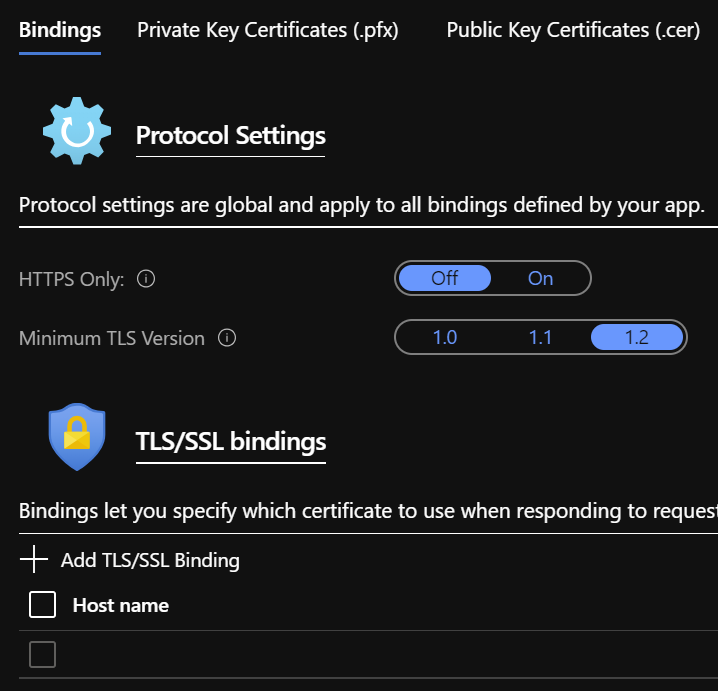
- Configure Custom Domains and TLS/SSL Settings
By default, the new web app is accessible via http://blazor-boilerplate.azurewebsites.net. To enable various security features in Blazor Boilerplate to function in a hosted environment it must be secured with a certificate.
Either:
- secure the default URL (in the azurewebsites.net domain)
Or:
- secure your own host in a custom domain you control (e.g., http://blazor-boilerplate.demodomain.com)
If you are using a custom domain, select Custom Domains and add and verify a new custom domain. Note: you will need access to DNS host records for your chosen domain to verify it using the custom domain verification ID. In this example we have added blazor-boilerplate.demodomain.com as a custom domain.
Create a Private Key Certificate which will be used for TLS/SSL binding, using the hostname you have chosen, in this example blazor-boilerplate.demodomain.com. Use a development certificate like AuthKey.pfx, create a self-signed certificate or a use a free service like letsencrypt.org. Make sure you mark the private key as exportable when you create the certificate.
Select TLS/SSL Settings and upload the .pfx certificate, then under Bindings add a binding to your chosen host name.
- Finally, select Overview and download the publish profile that you will later import into Visual Studio.
Create and Configure Azure SQL Server and SQL Database
Create a new Azure SQL server called blazor-boilerplate-demo-sql in the blazor_boilerplate_demo_rg resource group (very simple to do so instructions not shown here).
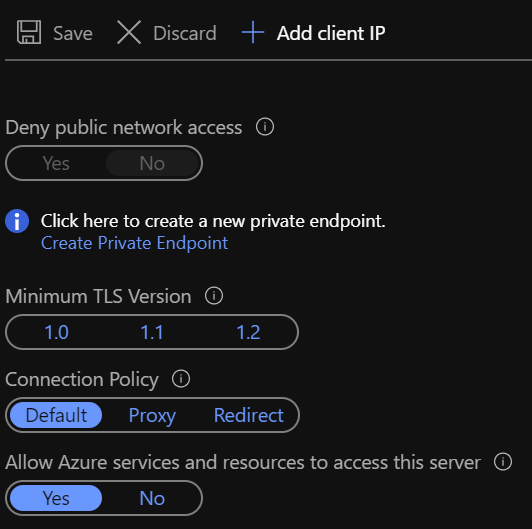
Select Show Firewall Settings and ensure that Allow Azure services and resources to access this server is turned on.
Select + Create Database and configure the new database as follows:
Database Name: blazor-boilerplate-demo-db
Elastic Pool: No
Compute/Storage: Basic 5DTU/2GB (about US$5 per month)
Admin Login: <Your_Admin_Username>
Admin Password: <Your_Admin_Password>
Once created, open the new SQL database resource and select Show database connection strings. Copy the ADO.NET (SQL Authentication) string and save it for use in the next step.
Configure Visual Studio Project for Azure Publishing
Open the Blazor Boilerplate solution in VS and select the BlazorBoilerplate.Server project. Right-click/Publish and select + New to create a new profile. Select Import Profile and now browse and select the Azure Web Deploy publish profile you downloaded from the Overview tab earlier.
Edit the new profile and configure as follows:
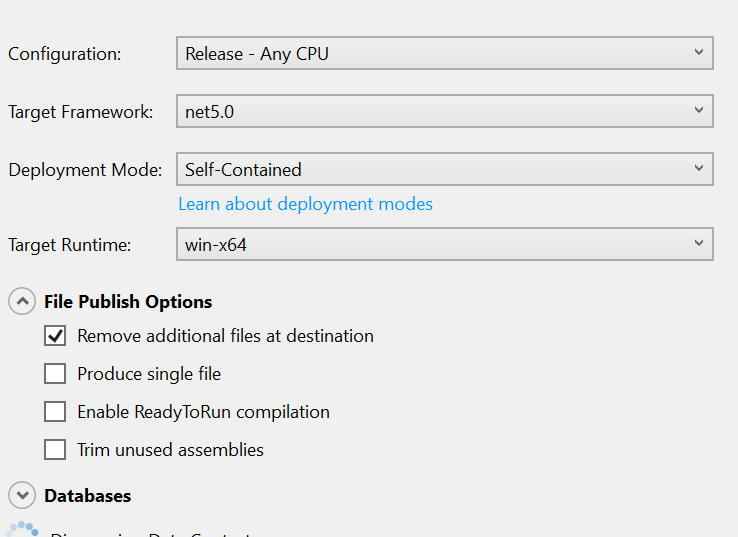
Configuration: Debug - Any CPU
Framework: .Net5.0
Deployment Mode: Self-Contained
Runtime: win-x64
File Publish: Remove additional files at destination
Databases/Default: Use this connection string at runtime
Now paste the SQL database connection string you saved earlier and make this modification. Change ‘Server’ to ‘Data Source’. The final string should look something like this:
Data Source=tcp:blazor-boilerplate-demo-sql.database.windows.net,1433; Initial Catalog=blazor-boilerplate-demo-db;User Id=<adminusername>; Password=<adminuserpassword>; Trusted_Connection=False; Encrypt=True; MultipleActiveResultSets=True;
Paste the same connection string into each of the Entity Framework Migrations.

Select the Connection tab and confirm that the Destination URL is http://blazor-boilerplate.azurewebsites.net or change it to your custom one (http://blazor-boilerplate.demodomain.com) if you are using a custom domain. This is the URL that the publish tool will open after publishing.
Create and Configure Azure Key Vault
Azure Web App could be running multiple instances in multiple deployment slots. By default, the app stores encrypted information in local storage and separate instances can’t access it. We need to store it in a central, protected place that can be accessed by all instances, and all instances must be able to unencrypt the content.
We use Azure Blob Storage as the central store (persistence provider) and Azure Key Vault as the common encryption provider.
Create a new Azure Key Vault in the blazor_boilerplate_demo_rg resource group and name it blazor-boilerplate-demo-kv.
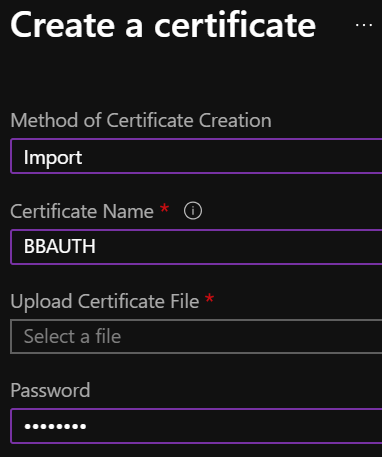
Open the new resource, select Certificates and choose + Generate/Import, then import your .pfx certificate.
Give the certificate the name BBAUTH and password Admin123.
Select the certificate in the list and check that Issuance Policy / Advanced Policy Configuration has Exportable Private Key set to Yes.
Select and open the certificate and copy the X.509 SHA-1 Thumbprint (in hex) for use later in appsettings.json.
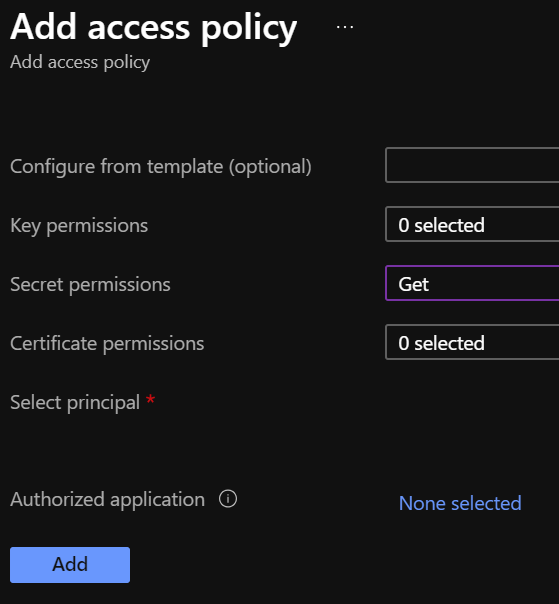
Return to the key vault main menu and select Access Policies. Add a new policy, then click Select Principal and search for / select the Azure App Service you created earlier (e.g. blazor-boilerplate).
Give the policy Get access to Secret Permissions, because Identity Server needs access to the private key so we will import the certificate as a secret. It should also have Get access to Certificate Permissions.
Copy the DNS Name of the key vault and save it so that you can add it to appsettings.json in a later step.
Create and Configure Blob Storage (for keys.xml)
In Startup.cs we persist keys to Azure Blob Storage and protect them with Azure Key Vault. We therefore need access to a private blob container to store the keys.
Create an Azure Storage Account in the blazor_boilerplate_demo_rg resource group and name it blazorboilerplate_storage or similar.
Open the new resource and select + Container to create a new blob container called blazor-boilerplate-keys. The access level should be private.
Return to the storage account and select Access Keys, then unhide the keys. Copy the key1 or key2 Connection String and save it so that you can add it to appsettings.json in the next step.
Configure Blazor Boilerplate & Deploy to Azure
Configure Azure settings in appsettings.json
In Visual Studio, open the BlazorBoilerplate solution if it isn’t already, then select the BlazorBoilerplate.Server project. Edit appsettings.json.
Set DefaultConnection to the string we stored earlier, e.g:
Data Source=tcp:blazor-boilerplate-demo-sql.database.windows.net,1433; Initial Catalog=blazor-boilerplate-demo-db; User Id=<adminusername>; Password=<adminuserpassword>; Trusted_Connection=False; Encrypt=True; MultipleActiveResultSets=True;
Edit both of the following sections and insert your own saved parameters where shown:
HostingOnAzure
“RunsOnAzure”: true,
“RunningAsAppService”: true,
“RunningAsDocker”: false, // not implemented yet.
“AzureKeyVault”: {
“UsingKeyVault”: true,
“UseManagedAppIdentity”: true,
“AppKey”: “”, // not implemented yet.
“AppSecret”: “”,
“KeyVaultURI”: “https://blazor-boilerplate-demo.vault.azure.net/”,
“CertificateIdentifier”: “https://blazor-boilerplate-demo.vault.azure.net/certificates/BBAUTH/<HEX_STRING_HERE>”,
“CertificateName”: “BBAUTH”,
“ContainerName”: “blazor-boilerplate-keys”,
“KeysBlobName”: “keys.xml”
}
BlazorBoilerplate
“ApplicationUrl”: “https://blazor-boilerplate.demodomain.com”,
“IS4ApplicationUrl”: “https://blazor-boilerplate.demodomain.com”,
“UseLocalCertStore”: false,
“CertificateThumbprint”: “<X.509_SHA-1_THUMBPRINT_HERE>”,
…
You may also want to change Serilog / MinimumLevel / Default from ‘Warning’ to ‘Debug’ while you are getting the demo up and running.
Check / Modify Startup.cs
In Visual Studio, open the BlazorBoilerplate solution if it isn’t already, then select the BlazorBoilerplate.Server project. Edit Startup.cs.
The section that relates to Azure hosting begins around line 147. Find the two lines below:
dataProtectionBuilder.PersistKeysToAzureBlobStorage(blobClient);
dataProtectionBuilder.ProtectKeysWithAzureKeyVault(new Uri(certificateIdentifier), new DefaultAzureCredential(credentialOptions));
There is a current limitation of persisting keys to blob storage. The blob won’t get created on first run, and the app will probably error on startup. To fix this, comment out the line dataProtectionBuilder.ProtectKeysWithAzureKeyVault, publish the app and let it run, and verify that keys.xml is created in the keys blob container before you uncomment it.
Publish the BlazorBoilerplate Solution
Right-Click the BlazorBoilerplate.Server project and select Publish. Hit the Publish button and check that the app publishes without errors and opens a browser with the URL you specified earlier in the publish profile.
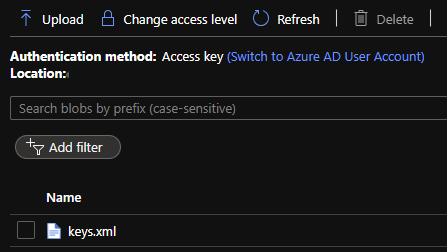
If the app was published successfully, you can now check that it managed to persist keys to blob storage. Open your Storage Account and select Containers. Open the blazor-boilerplate-keys container and confirm that keys.xml now exists. If so, proceed to the final step below.
The site should now redirect to https://blazor-boilerplate.demodomain.com or https://blazor-boilerplate.azurewebsites.net if you aren’t using a custom domain, and open correctly at the Blazor Boilerplate home page.
Azure Troubleshooting Tips
Kudu
The Kudu Diagnostic Console is available at https://blazor-boilerplate.scm.azurewebsites.net/DebugConsole.
A few of the more useful troubleshooting logs are:
/LogFiles/stdout_???_??.log.
/site/wwwroot/Logs/log-????.log. If you set the SerilogMinimumLevel to Debug earlier you will see the full series of startup log entries, including any errors related to startup.
You can also stream logs from the web app either within the Azure Portal (Web App Service / Monitoring / Log Stream) or to Visual Studio if you prefer.
Remote Debug in Visual Studio
To remotely debug, you must first publish a Debug Configuration of Blazor Boilerplate to Azure. Edit the Publish Profile in Visual Studio and set Configuration to Debug - Any CPU.
As a simple remote debugging test, try the following:
Open the Shared / Modules folder and the BlazorBoilerplate.Theme.Material.Demo project. Open the Pages folder and edit TodoList.razor. Set a breakpoint at the line await LoadMainEntities();
Open Cloud Explorer in Visual Studio and select your web app within your subscription (under App Services), right-click and Attach Debugger to the Blazor Boilerplate app. The Visual Studio Output Window will show the application starting up. Once symbols are loaded a browser should open and display the home page. Select ToDo List and execution should halt at the await LoadMainEntities(); breakpoint in VS.
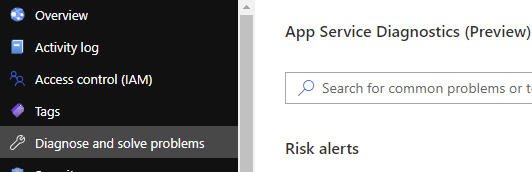
Azure Portal Web App Diagnostic Tools
App Service Diagnostics as accessed via Diagnose and Solve Problems within the Web App on the Azure Portal.
Diagnostic Tools has a couple of useful tools, including Check Connection String, access to Application Event Logs, and Advanced Application Restart